SPATIAL EXCEL RECOGNIZES MANY DIFFERENT SPATIAL DATA FORMATS. THIS EXAMPLE IS FOR A SHAPEFILE
(.shp); THE MOST COMMONLY USED SPATIAL DATA FORMAT.
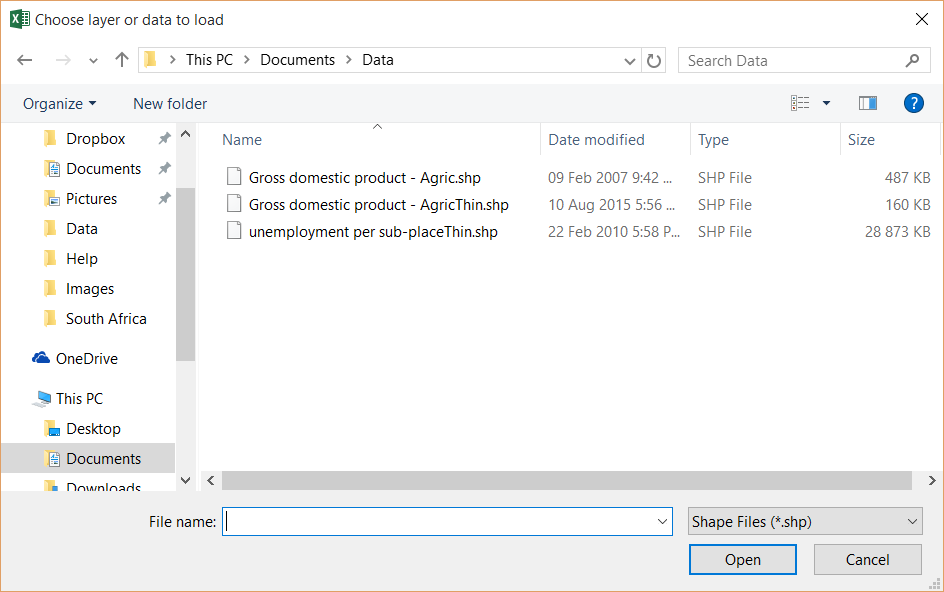
1. Click the OPEN button in the shortcut menu to add a shapefile to the Spatial pane.
2. Set the file type as SHAPE FILES. (*.shp)
3. Browse to the location of the file.
4. Double click the file or click OPEN. (Alternatively you can just drag and drop the shapefile (*.shp) directly into your Spatial
pane.
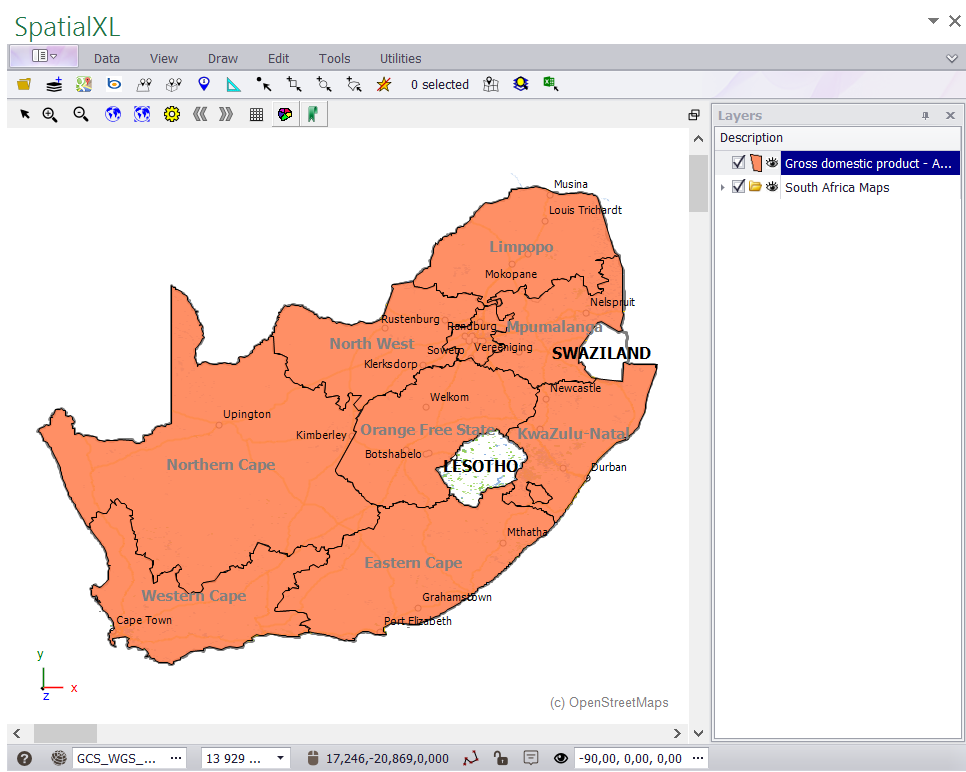
5. The layer will draw on your map in standard colours and appear in your Layer Description box.
6. To change the name double click the layer and type in a name.
|
Copyright (c) PrimeThought Software Solutions CC


