§ THE MAP DRAWING TOOLS ENABLE YOU TO CREATE (DRAW) YOUR OWN MAP LAYERS AND SAVE THEM TO FILE
E.G. SHAPEFILE. THE DRAWING TOOLS CAN BE ACCESSED FROM THE DRAW TAB IN THE SPATIAL RIBBON.
Before you begin drawing you need to create a new layer to draw to:
1. Click the DATA tab.
2. Click ADD LAYER.
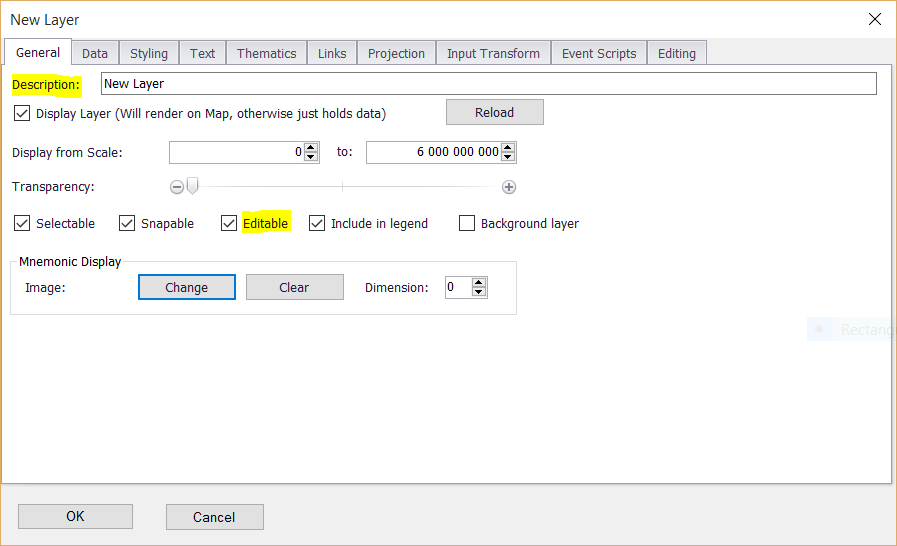
3. A LAYER PROPERTIES box will now be brought up.
4. In the DESCRIPTION box give your new layer a name.
5. Tick on the EDITABLE box.
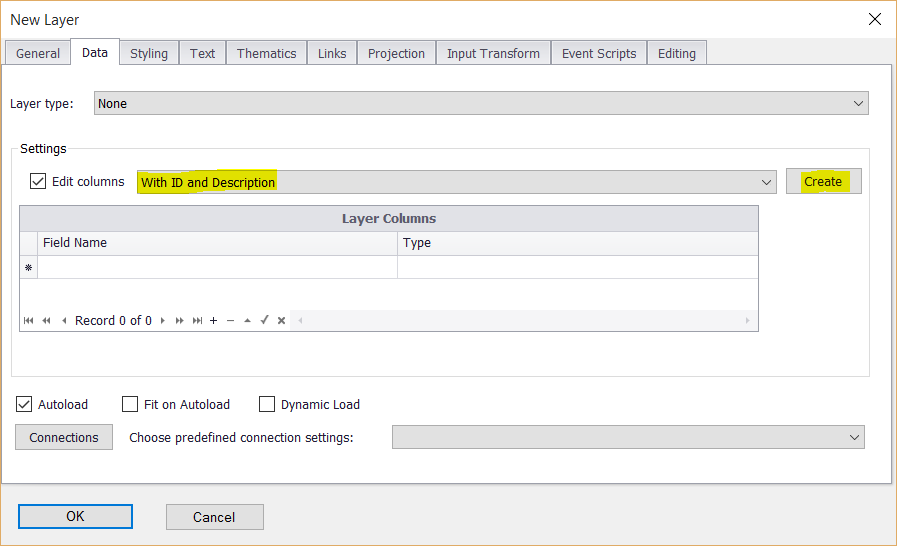
6. Click the DATA tab.
7. Choose to add columns to your map layer grid. If you would like to add a numeric ID for each feature, select WITH ID. If you
would like to add a text description for each feature, select WITH DESCRIPTION. If you would like both choose WITH ID AND
DESCRIPTION. (Recommended)
8. Click CREATE. (A pop up box may appear asking if you want to replace the current columns. Click YES.)
9. Your layer should now appear in your LAYER DESCRIPTION box.
10. Right click your new layer and click ACTIVE.
11. The layer name should now appear in bold text which means any data that you draw will be added to this layer.
12. Make sure your layer is selected (highlighted in blue) before you begin drawing.
|
Copyright (c) PrimeThought Software Solutions CC


