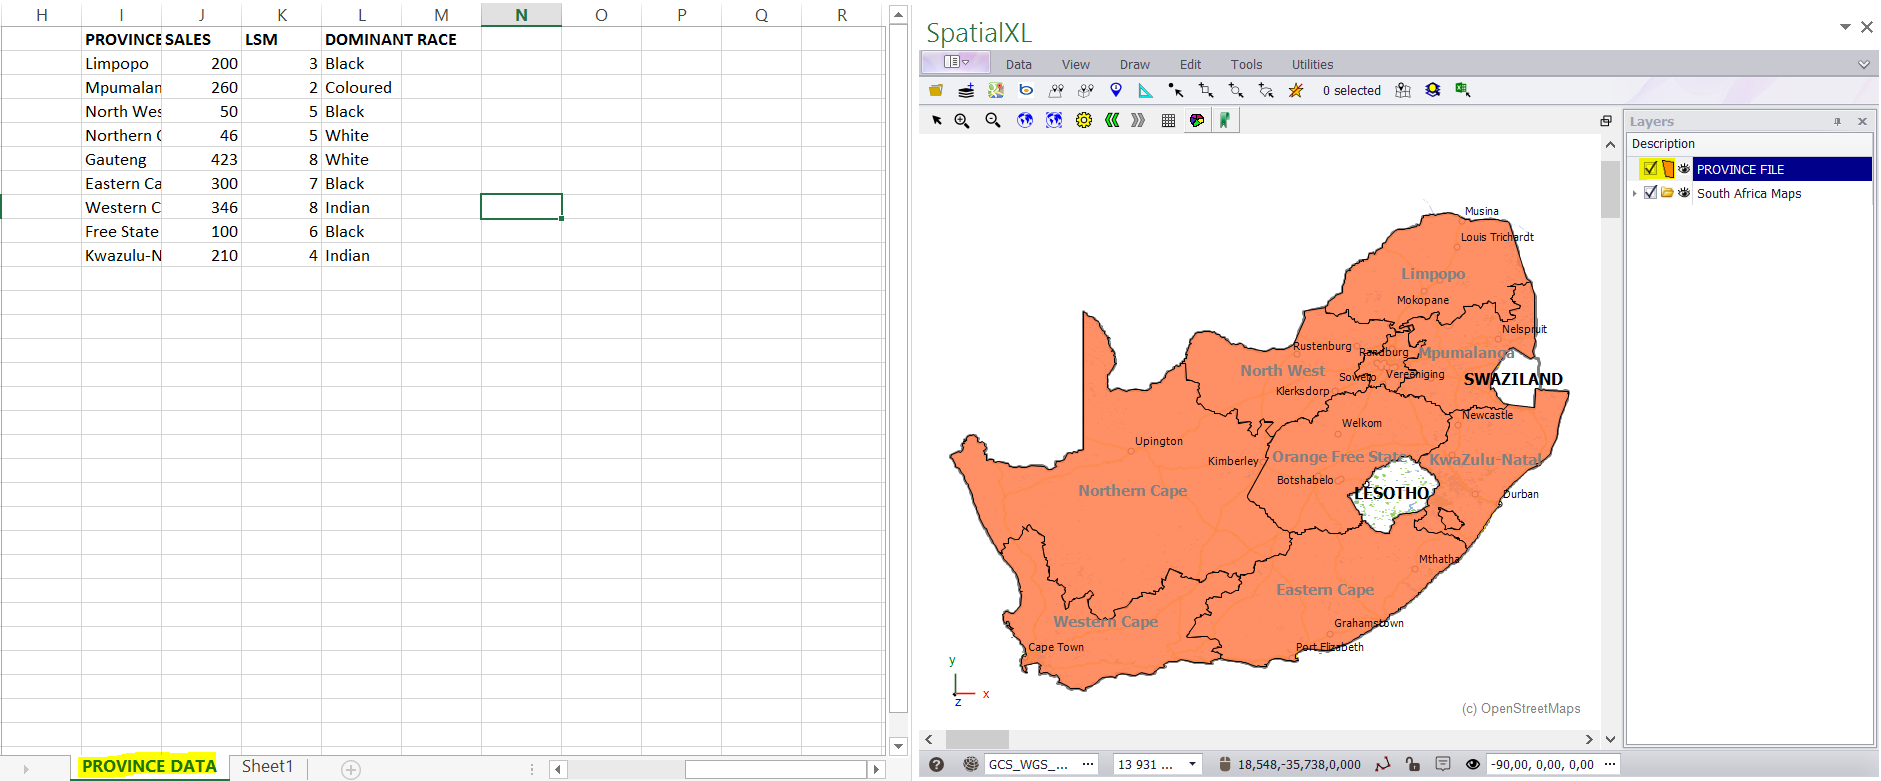
§ THE FOLLOWING STEPS EXPLAIN HOW TO LINK AN EXISTING SPREADSHEET TO A SHAPEFILE USING A UNIQUE ID.
1. Have a shapefile open and visible on your map.
2. Have a spreadsheet with data. (The spreadsheet must have a unique code that will link to your shapefile e.g.
PROVINCES. Give the sheet a name if it does not already have one e.g. PROVINCE DATA.)
3. Click the LINK EXCEL RANGE button in the SpatialXL ribbon.
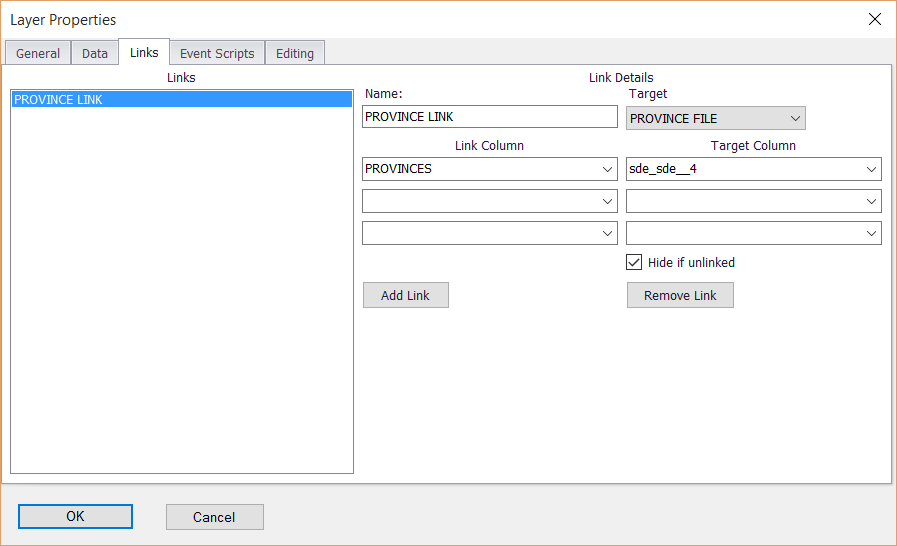
4. The LAYER PROPERTIES box will appear.
5. Click ADD LINK.
6. Give the link a name e.g. PROVINCE LINK.
7. Select the TARGET link. (The shapefile you are linking to e.g. PROVINCE FILE.shp)
8. Select the LINK COLUMN and the TARGET COLUMN from the drop down menus e.g. PROVINCES. (This must be a unique
ID that is common to your spreadsheet and your shapefile.)
9. Tick on HIDE IF UNLINKED under the TARGET COLUMN. This will ensure that your map layer works correctly when you
filter etc in the spreadsheet.
10. Click OK when you are done.
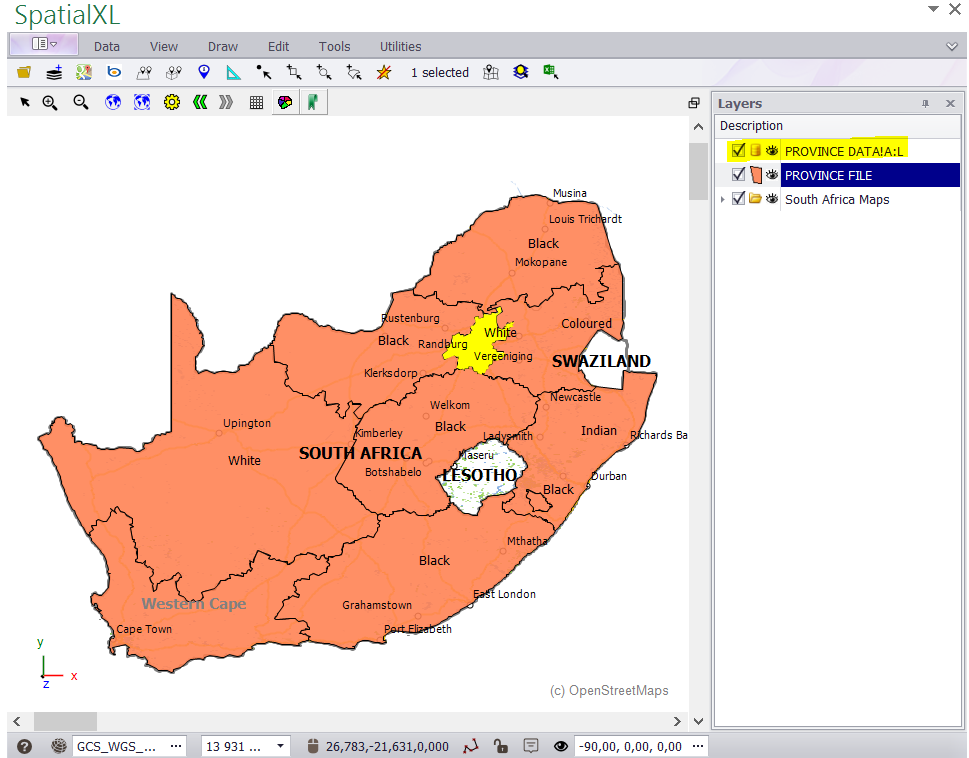
11. Your PROVINCE DATA spreadsheet and PROVINCE FILE shapefile are now linked. Any filters you do in your
spreadsheet will automatically display on your map.
12. A non graphic linked layer will also add to your LAYERS DESCRIPTION box. This holds the link information between your
shapefile and your spreadsheet. If you remove this layer you will break the link.
|
Copyright (c) PrimeThought Software Solutions CC


