§ THE CLUSTER TOOL IN THE SPATIAL XL RIBBON ALLOWS YOU TO BUILD CLUSTERS OR DISTRICTS USING BOTH
GEOGRAPHIC AND NON GEOGRAPHIC PARAMETERS.
1. Make sure any fields you want to work with are in your spreadsheet and you have added your spreadsheet as a layer to your
map.
2. Make sure your layer is displaying and ticked on in the LAYERS DESCRIPTION box.
3. Click the TOOLS tab in the Spatial XL ribbon.
4. Click the CLUSTER button.
5. The CLUSTER DESIGNER box will appear.
6. Click the SETTINGS tab.
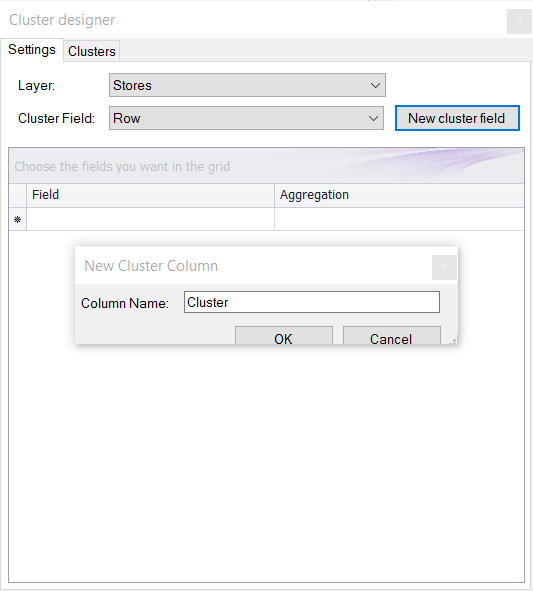
7. From the LAYER drop down menu select your map layer e.g. STORES.
8. Click NEW CLUSTER FIELD and type in a column name for the cluster field that will be added to the end of your
spreadsheet when you have finished the clustering exercise e.g. CLUSTER.
9. Click OK.
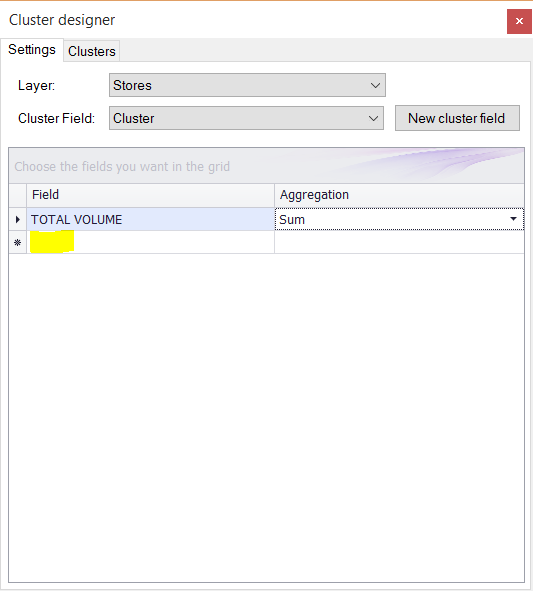
10. If you have any field(s) that you want to aggregate and display in the cluster grid, you can select them here.
11. Click the first cell in the FIELD column and choose your first field e.g. TOTAL VOLUME.
12. Click the first cell in the AGGREGATION field to choose your aggregation type e.g. SUM.
13. To add more fields click in the grid just below your first row.
14. Click the CLUSTERS tab.
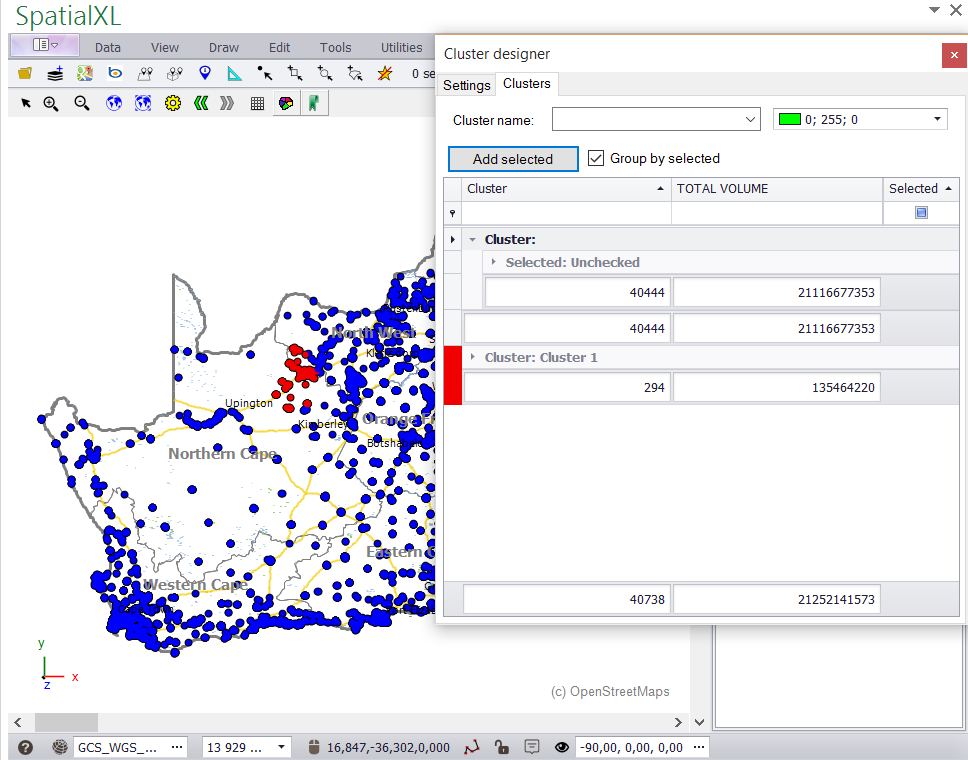
15. In the CLUSTER name box give your first cluster a name e.g. CLUSTER 1.
16. Change the colour of your cluster if required.
17. Select the points for your first cluster by clicking on one of the map selection tools and draw an area around the points in
your first cluster to highlight them.
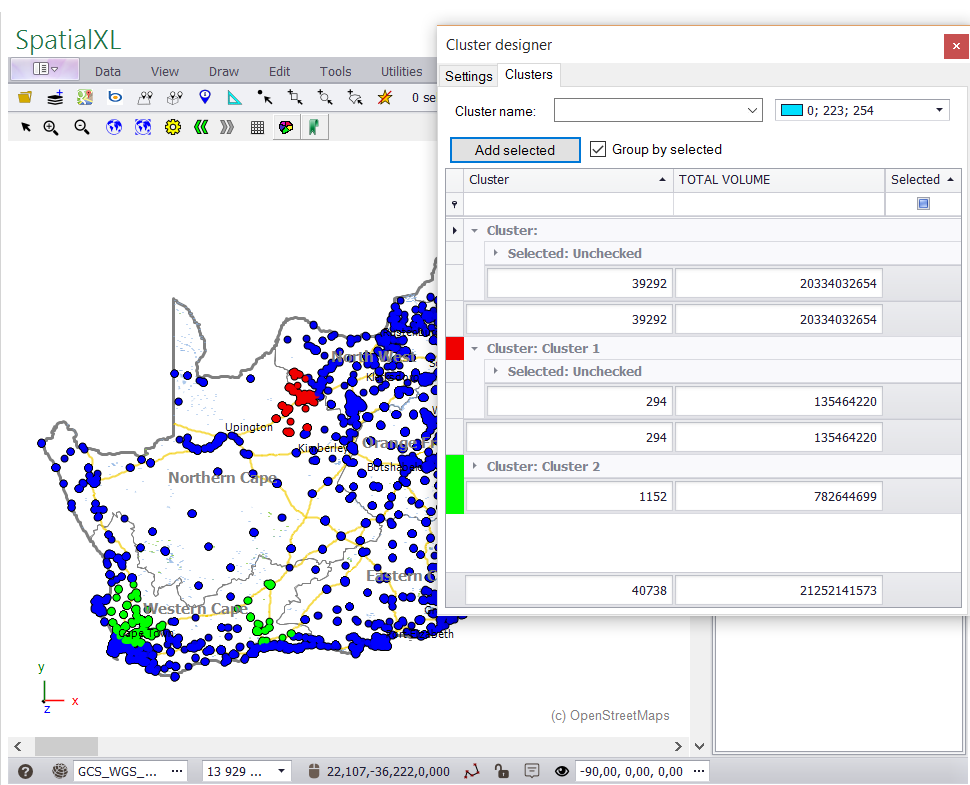
18. You can check how many points have been selected in the quick select box as well as in the CLUSTER DESIGNER grid.
19. The CLUSTER DESIGNER grid will also give you totals for any other fields you have e.g. TOTAL VOLUME.
20. If you would like to change your selection you can select or deselect points from the map.
21. If you are happy with your selection click ADD SELECTED.
22. Your first cluster will now add to your cluster grid and display on your map.
23. Any fields that you have in your cluster grid will be aggregated accordingly.
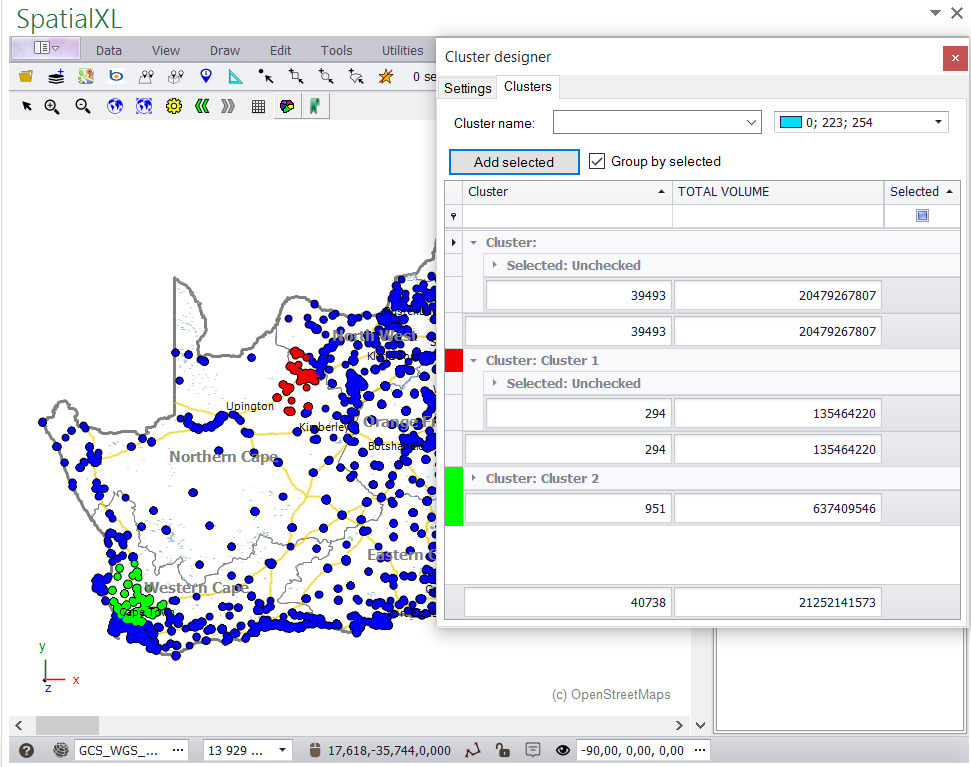
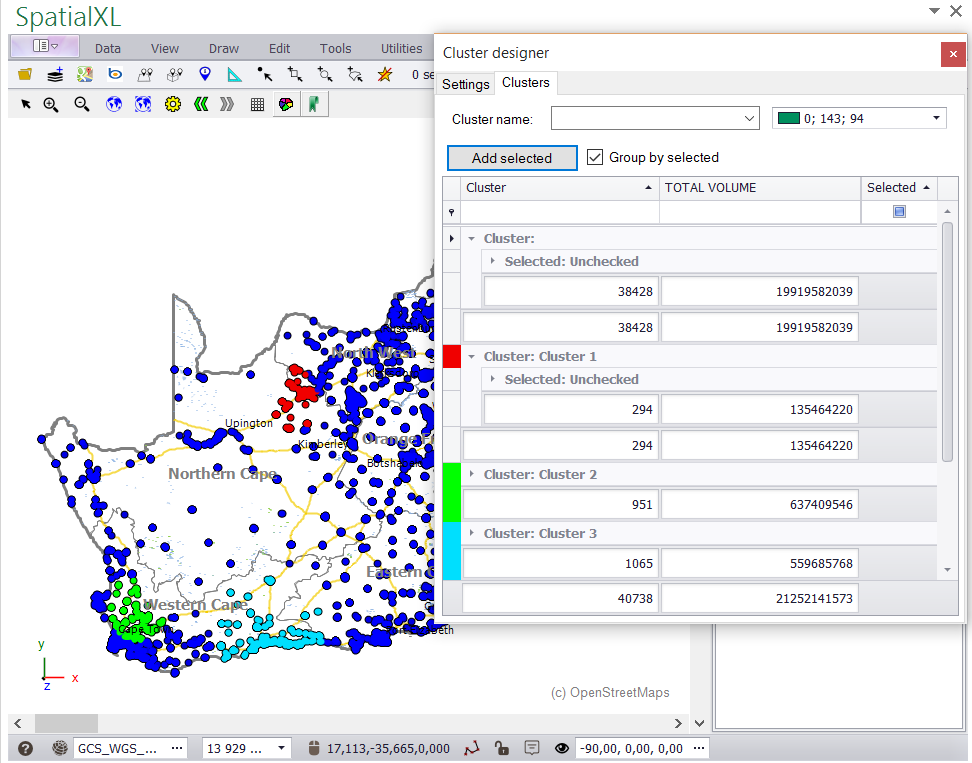
24. To add you second cluster repeat the steps above starting from giving your cluster a name e.g. CLUSTER 2.
25. When you are finished your second cluster will display in the grid and on the map.
26. Continue to add clusters in a similar way until all your points have been assigned.
27. Once you have finished building your clusters you can close the CLUSTER DESIGNER box.
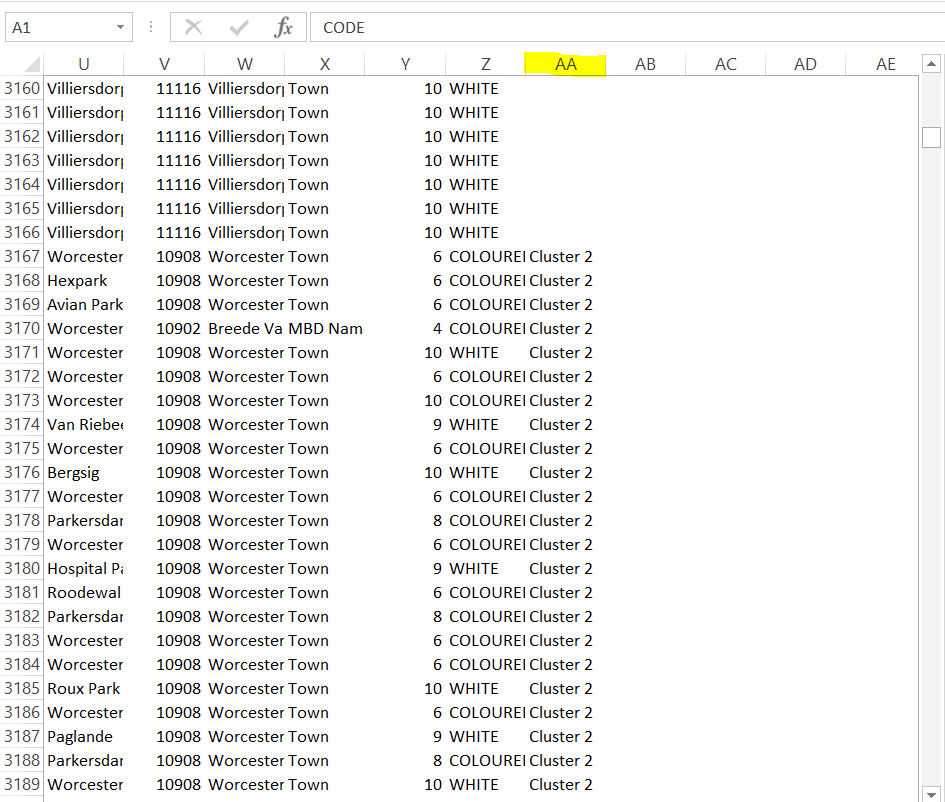
28. The cluster column will automatically add to your spreadsheet and assign the name of the cluster to each row - if you make
any changes to your clusters in future these will automatically update in your column.
MAKING CHANGES TO YOUR CLUSTERS
ADDING POINTS TO YOUR CLUSTER:
1. The clusters you have already created will appear in the CLUSTER NAME drop down box.
2. Select the name of the cluster you want to add points to e.g. CLUSTER 2.
3. Use the map selection tools to select the points you want to add on the map.
4. Click ADD SELECTED.
5. The points will add to your existing cluster and the values in your cluster grid will update accordingly.
MOVING POINTS FROM ONE CLUSTER TO ANOTHER
1. In the CLUSTER NAME box select the cluster you want to move your points to e.g. FROM CLUSTER 2 to CLUSTER 3.
2. Use one of the map selection tools to select the points you want to move on the map.
3. Click ADD SELECTED.
4. The points will add to your existing cluster and the values in your cluster grid will update accordingly.
REMOVING A CLUSTER
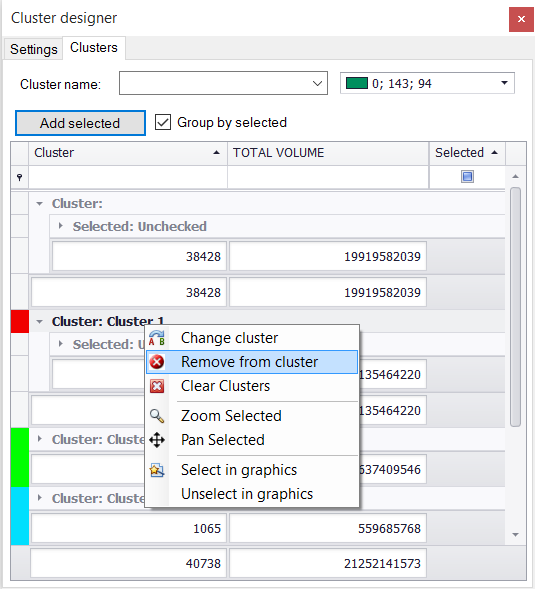
1. To remove a cluster right click the name of the cluster and click REMOVE FROM CLUSTER.
2. To remove all clusters right click a row and click CLEAR CLUSTERS.
3. Click YES. (This only applies if you want to remove all clusters, otherwise the individual cluster will just remove automatically)
|
Copyright (c) PrimeThought Software Solutions CC

