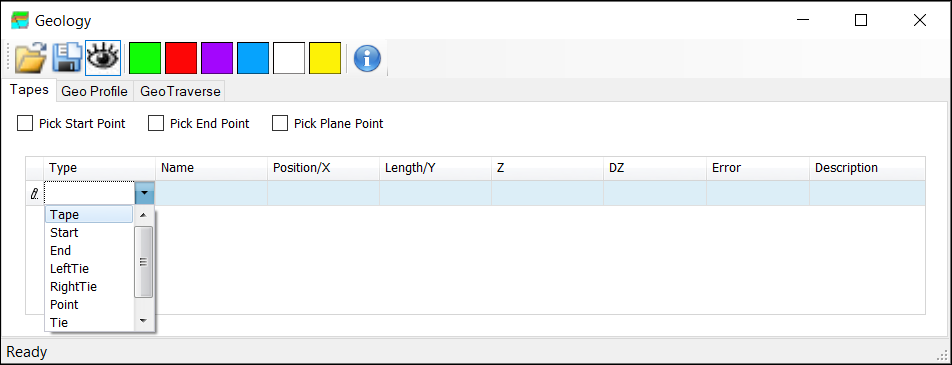
❖ The first item in the Geology dialog is the Tapes section.
❖ In this, you can put in tapes by either clicking start and end points or typing in the start and end points and putting in the different ties etc.
❖ To start putting in a new tape, click on the cell under Type and select Tape.

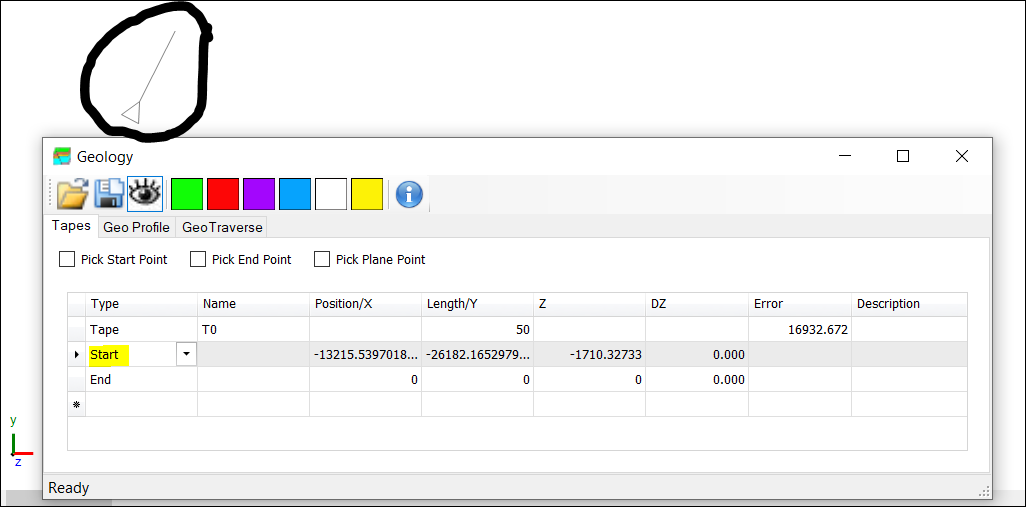
❖ Type in the Length/Y of the Tape.

❖ I will Pick Start Point from the scene. First click under Tape and select Start. Then check on Pick Start Point. Click on the scene to now choose the start point.

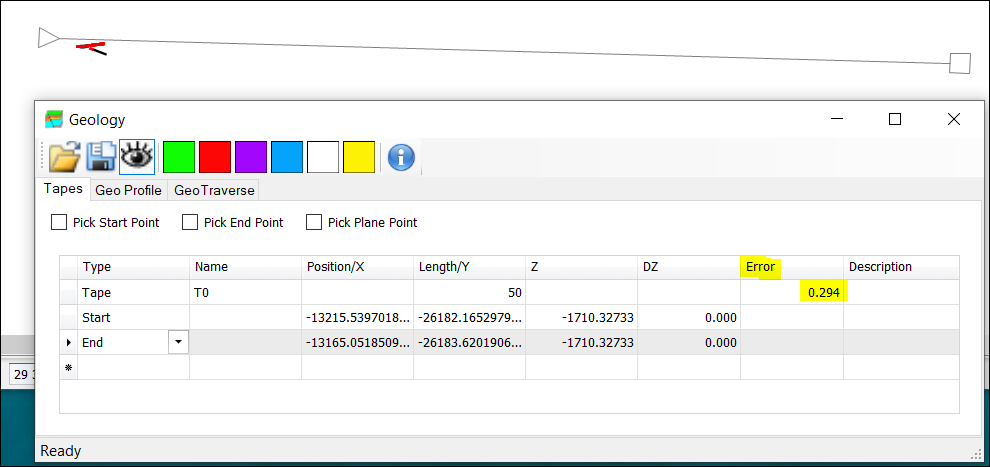
❖ End will then automatically populate. Check on Pick End Point and then click on the scene to choose it. (You will also see the start point of the Tape being drawn on your scene indicated by the triangle and line circled above.)

❖ The Tape is now drawn. The square indicates the end point of the Tape. The Error in the Tape row indicates the difference between the length of the Tape and the length between the start and end points. In this instance, it is 0.294m off from the length of the Tape.
❖ Descriptions can also be added as needed by typing them in.
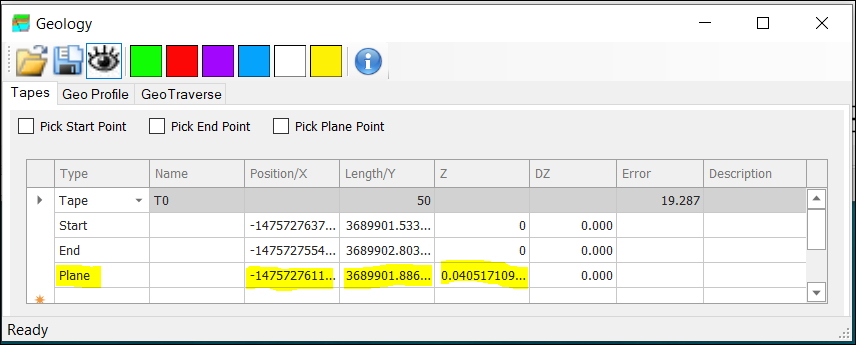
❖ You can also choose a Plane for your Tape. To do this, first rotate your scene about the tape to the appropriate position. Then check on Pick Plane Point. Click on the Tape in graphics to select the plane point. This data will then be added as a row in the Geology window.

❖ Tapes can be referenced to pegs, reference points, other tapes or a combination of these.